Chorus One Validator
kyvevaloper16pj5gljqnqs0ajxakccfjhu05yczp987rv492n or use:
Recommended Wallets
Block Explorer
Staking Rewards
https://www.stakingrewards.com/asset/kyve-network
Unstaking Period
21 Days
Kyve Network (KYVE) is a blockchain protocol focused on data availability and management, enabling developers to securely store, validate, and retrieve data in a decentralized way.
It achieves this by combining efficient data storage with a consensus layer, ensuring that the data is both immutable and verifiable. By leveraging its unique data archiving mechanisms, Kyve allows applications, especially in blockchain and Web3 ecosystems, to access reliable historical data without the need for centralized storage solutions. This makes it a beneficial infrastructure for projects requiring accurate data retrieval, such as DeFi protocols, oracles, and analytics platforms.
This combination of decentralization, scalability, and reliability allows Kyve to serve an important role for managing the growing demand for decentralized data in the blockchain space.
For the focus of this guide, we recommend using the Keplr wallet. While Leap is usable, this guide will be walking through a demonstration with Keplr.
However, if you would like to use Leap wallet and stake directly to the Chorus One validator via Mintscan, you can reference the quick guide below to start your Leap wallet.
If you already have a wallet installed, feel free to skip ahead to: Stake your KYVE


In case you don't have the Keplr extension installed in your browser, please visit https://www.keplr.app/ and click on 'Install Keplr'.


Click on Install Keplr for Chrome if you are using a Chrome browser or Brave if you are using the Brave browser and follow the installation instructions.
Click on the extension in the Chrome/Brave toolbar and the following page will open up.

In case you do not have an existing Keplr account you can click 'Create a new wallet'.
If you already have a wallet to use, you can select 'Import an existing wallet' or you can connect with a compatible hardware wallet, such as a Ledger device.

If you choose to create a new wallet you will be shown 12 words as your mnemonic seed.
Please be sure to back up your mnemonic seed securely.
Never share this seed phrase with anyone, as they will have access to your funds.
Next, enter an account name and a passphrase to lock and unlock your wallet. You will be asked for the mnemonic again.

After verifying your 12 or 24 word phrase, you will be prompted to select any other Cosmos Hub networks you'd like to add to your wallet.
No need to add any other networks if you don't plan on using them yet. You can always select more networks later.
However, it is advisable to have 'Cosmos Hub' selected when creating your new wallet.

Once you selected the relevant networks you want to use, click 'Save' and you'll be all set to go.

Regardless of whether you already have an wallet or if you just created it, you can now click on the Keplr extension to view your address or visit https://wallet.keplr.app/?tab=overview to see your full Keplr dashboard.

If you don't already have some KYVE in your wallet, you can fund it with some tokens. You may use an exchange to transfer the tokens to your address or get them from a trusted third party that already holds some.
If you want to stake from the browser extension wallet, you can either navigate to the Keplr dashboard (shown below) or scroll down on the wallet screen and select KYVE.
Alternatively, you can connect Keplr to the Mintscan explorer and stake to the Chorus One validator at this address: kyvevaloper16pj5gljqnqs0ajxakccfjhu05yczp987rv492n
Or you can navigate to thenChorus One staking page and click on 'Stake Now'
Next, you will be prompted to stake.


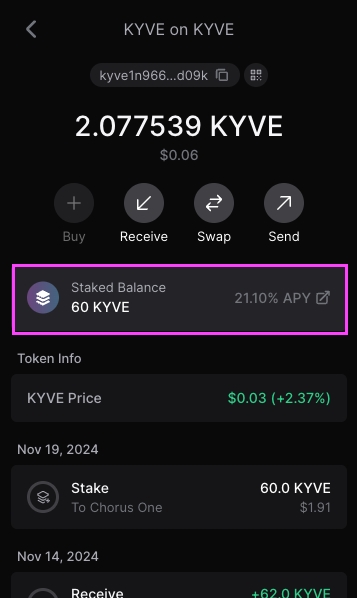
If you click on KYVE directly from your wallet extension, you will see the option to stake. Click on that to be taken to the staking dashboard in Keplr.

Alternatively, if you are already on the Keplr dashboard, to stake click on the 'Stake' tab on the left hand side of the dashboard.

Once there, you will see three steps highlighted in the pink box in the screenshot below.
Scroll or through the list or search for the chain you want, in this case KYVE.

Once you've chosen the Chorus One validator, select how many KYVE tokens you wish to stake, then click the 'Stake' button at the bottom of the screen.
Clicking on Stake will take you to Keplr wallet for approval. Approve the transaction and you will be able to see your stake.

Please note that KYVE has a 21-day unbonding process (also known as unstaking).
During this period your stake no longer earns rewards and cannot be transferred, exchanged, or spent.
However, you can cancel the unstaking process if you wish without penalty.
After some time you will see rewards accumulating in your wallet.

You can simply go to the Keplr dashboard to claim them by selecting 'Claim' and approving the transaction.
If you wish to unstake your KYVE, you can do so from the same interface in Keplr that you used to stake.


Simply click on the validator you wish to unstake from and you will be prompted with the following screen.

Please note that KYVE undergoes a 21 day unbonding period when unstaking.

To proceed, click on 'Unstake' and follow the prompts to select the amount of KYVE you wish to unstake.
Then confirm and sign the transaction in your wallet.
And that's it! Your KYVE will begin unbonding which you can track from your Keplr dashboard under the Staking tab.
You can view and manage all ongoing unstaking transactions (undelegations) from your Keplr dashboard and cancel them if you change your mind.

After the unbonding period is complete you will be able to transact with your unstaked KYVE again!